11

In this link : How do I apply a style programmatically?

Kevin Grant gave a explaination to this question my problem with his code is the context part. To be precise :

ctv = new CustomView(context, R.attr.tabStyleAttr);

In this code it says : context cannot be resolved to a variable

I want to apply specific style to tabs and that's why setting theme doesn't work for me. Any alternative to my problem is welcome too of course.

I try to change the background color, indicator color and text color of actionbar tabs.

@Override
public void onTabSelected(ActionBar.Tab tab, FragmentTransaction fragmentTransaction) 
{
    CustomView ctv;
    ctv = new CustomView(this, R.attr.tabStyleAttr);        
    tab.setCustomView(ctv);  
    mViewPager.setCurrentItem(tab.getPosition());
}

styles.xml

<?xml version="1.0" encoding="utf-8"?>
<resources>
    <style name="Theme.Ab" parent="@android:style/Theme.Holo.Light">
        <item name="android:actionBarStyle">@style/abStyle</item> 
        <item name="@attr/actionBarTabStyle">@style/tabStyle</item>        
        <item name="android:actionBarTabTextStyle">@style/tabTextColor</item>
    </style>   

    <style name="abStyle" parent="@android:style/Widget.Holo.Light.ActionBar.Solid">
        <item name="android:background">@drawable/ab_solid_style</item>
        <item name="android:backgroundStacked">@drawable/ab_stacked_solid_style</item>
        <item name="android:backgroundSplit">@drawable/ab_bottom_solid_style</item>
        <item name="android:height">100dp</item>
    </style>    

    <style name="tabStyle" parent="@android:style/Widget.Holo.Light.ActionBar.TabView">

        <item name="android:background">@drawable/tab_indicator_ab_style</item>
    </style>

    <style name="tabTextColor" parent="@android:style/Widget.Holo.Light.ActionBar.TabText">
        <item name="android:textColor">@android:color/white</item>
    </style>


</resources>

MainActivity.java (onCreate)

public void onCreate(Bundle savedInstanceState)
    {       
        super.onCreate(savedInstanceState);
        setContentView(R.layout.activity_main);

        // Create the adapter that will return a fragment for each of the three primary sections
        // of the app.
        mAppSectionsPagerAdapter = new AppSectionsPagerAdapter(getSupportFragmentManager());

        // Set up the action bar.
        final ActionBar actionBar = getActionBar();
        //set custom actionbar
        actionBar.setCustomView(R.layout.titlebar);
        //Displays the custom design in the actionbar
        actionBar.setDisplayShowCustomEnabled(true);
        //Turns the homeIcon a View     
        View homeIcon = findViewById(android.R.id.home);
        //Hides the View (and so the icon)
        ((View)homeIcon.getParent()).setVisibility(View.GONE);

        // Specify that we will be displaying tabs in the action bar.
        actionBar.setNavigationMode(ActionBar.NAVIGATION_MODE_TABS);

        // Set up the ViewPager, attaching the adapter and setting up a listener for when the
        // user swipes between sections.
        mViewPager = (ViewPager) findViewById(R.id.pager);
        mViewPager.setAdapter(mAppSectionsPagerAdapter);

        mViewPager.setOnPageChangeListener(new ViewPager.SimpleOnPageChangeListener()
        {           
            @Override
            public void onPageSelected(int position)
            {
                    // When swiping between different app sections, select the corresponding tab.
                    // We can also use ActionBar.Tab#select() to do this if we have a reference to the Tab.
                    actionBar.setSelectedNavigationItem(position);
            }
        });

        // For each of the sections in the app, add a tab to the action bar.
        for (int i = 0; i < mAppSectionsPagerAdapter.getCount(); i++)
        {

            // Create a tab with text corresponding to the page title defined by the adapter.
            // Also specify this Activity object, which implements the TabListener interface, as the
            // listener for when this tab is selected.
            Tab tab = actionBar.newTab().setText(mAppSectionsPagerAdapter.getPageTitle(i)).setTabListener(this);            
            actionBar.addTab(tab);
        }
    }

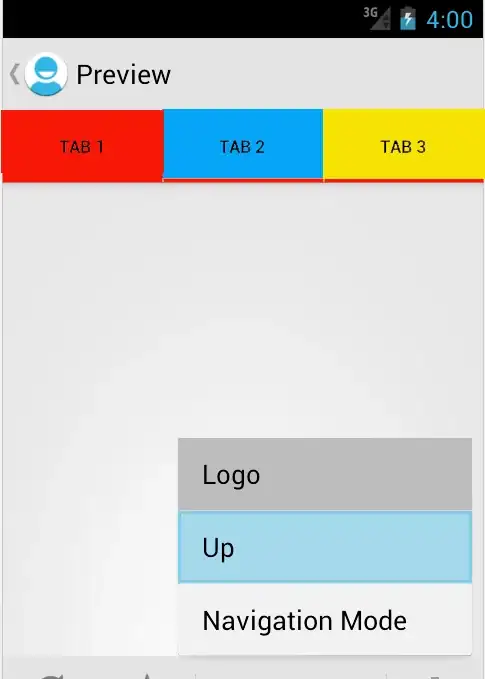
This is what I want to make:

Example


As for the new result using Views this happened

Using views

MainActivity.java

package com.example.android.effectivenavigation;

import android.app.ActionBar;
import android.app.ActionBar.Tab;
import android.app.FragmentTransaction;
import android.content.Context;
import android.content.Intent;
import android.graphics.Color;
import android.os.Bundle;
import android.support.v4.app.Fragment;
import android.support.v4.app.FragmentActivity;
import android.support.v4.app.FragmentManager;
import android.support.v4.app.FragmentPagerAdapter;
import android.support.v4.view.ViewPager;
import android.view.LayoutInflater;
import android.view.View;
import android.view.ViewGroup;
import android.widget.TextView;

public class MainActivity extends FragmentActivity implements ActionBar.TabListener
{
    AppSectionsPagerAdapter mAppSectionsPagerAdapter;
    //The viewpager displays on of the section at a time
    ViewPager mViewPager;

    public void onCreate(Bundle savedInstanceState)
    {       
        super.onCreate(savedInstanceState);
        setContentView(R.layout.activity_main);

        // Create the adapter that will return a fragment for each of the three primary sections
        // of the app.
        mAppSectionsPagerAdapter = new AppSectionsPagerAdapter(getSupportFragmentManager());

        // Set up the action bar.
        final ActionBar actionBar = getActionBar();
        //set custom actionbar
        actionBar.setCustomView(R.layout.titlebar);
        //Displays the custom design in the actionbar
        actionBar.setDisplayShowCustomEnabled(true);
        //Turns the homeIcon a View     
        View homeIcon = findViewById(android.R.id.home);
        //Hides the View (and so the icon)
        ((View)homeIcon.getParent()).setVisibility(View.GONE);


        // Specify that we will be displaying tabs in the action bar.
        actionBar.setNavigationMode(ActionBar.NAVIGATION_MODE_TABS);

        // Set up the ViewPager, attaching the adapter and setting up a listener for when the
        // user swipes between sections.
        mViewPager = (ViewPager) findViewById(R.id.pager);
        mViewPager.setAdapter(mAppSectionsPagerAdapter);

        mViewPager.setOnPageChangeListener(new ViewPager.SimpleOnPageChangeListener()
        {           
            @Override
            public void onPageSelected(int position)
            {
                    // When swiping between different app sections, select the corresponding tab.
                    // We can also use ActionBar.Tab#select() to do this if we have a reference to the Tab.
                    actionBar.setSelectedNavigationItem(position);
            }
        });
       /*final Tab firstTab = actionBar.newTab()
                .setText(mAppSectionsPagerAdapter.getPageTitle(0))
                .setTabListener(this)
                .setCustomView(R.id.nieuws_tab_layout);
        /*final Tab secondTab = actionBar.newTab()
                 .setText(mAppSectionsPagerAdapter.getPageTitle(1))
                 .setCustomView(R.id.nieuws_tab_layout);
        final Tab thirdTab = actionBar.newTab()
                .setText(mAppSectionsPagerAdapter.getPageTitle(2))
                .setCustomView(R.id.nieuws_tab_layout);

        actionBar.addTab(firstTab);
        actionBar.addTab(secondTab);
        actionBar.addTab(thirdTab);*/

        // For each of the sections in the app, add a tab to the action bar.
        for (int i = 0; i < mAppSectionsPagerAdapter.getCount(); i++)
        {
            if(i == 0)
            {
                final View firstCustomView = new CustomView(this);
                //firstCustomView.setBackgroundColor(Color.BLUE);
                Tab tab = actionBar.newTab().setText(mAppSectionsPagerAdapter.getPageTitle(i)).setTabListener(this).setCustomView(R.layout.nieuws_tab_layout);
                actionBar.addTab(tab);
            }
            else
            {
            // Create a tab with text corresponding to the page title defined by the adapter.
            // Also specify this Activity object, which implements the TabListener interface, as the
            // listener for when this tab is selected.
            Tab tab = actionBar.newTab().setText(mAppSectionsPagerAdapter.getPageTitle(i)).setTabListener(this);            
            actionBar.addTab(tab);
            }
        }
    }

    @Override
    public void onTabUnselected(ActionBar.Tab tab, FragmentTransaction fragmentTransaction) 
    {
    }

    @Override
    public void onTabSelected(ActionBar.Tab tab, FragmentTransaction fragmentTransaction) 
    {
        //CustomView ctv;
        //ctv = new CustomView(context, R.attr.tabStyleAttr);
        // When the given tab is selected, switch to the corresponding page in the ViewPager.
        //LayoutInflater inflater = (LayoutInflater) getSystemService(LAYOUT_INFLATER_SERVICE);
        //View tabView = inflater.inflate(R.layout.nieuws_tab_layout, null);
        //tabView.setBackgroundColor(0xFF00FF00);
        //tab.setCustomView(tabView);  
        mViewPager.setCurrentItem(tab.getPosition());
    }

    @Override
    public void onTabReselected(ActionBar.Tab tab, FragmentTransaction fragmentTransaction)
    {
    }

    public static class AppSectionsPagerAdapter extends FragmentPagerAdapter 
    {
        public AppSectionsPagerAdapter(FragmentManager fm)
        {
            super(fm);
        }

        @Override
        public Fragment getItem(int i) 
        {
            switch (i)
            {
                case 0:
                    // The first section of the app is the most interesting -- it offers
                    // a launchpad into the other demonstrations in this example application.
                    return new LaunchpadSectionFragment();

                default:
                    // The other sections of the app are dummy placeholders.
                    Fragment fragment = new DummySectionFragment();
                    Bundle args = new Bundle();
                    args.putInt(DummySectionFragment.ARG_SECTION_NUMBER, i + 1);
                    fragment.setArguments(args);
                    return fragment;
            }
        }

        @Override
        public int getCount()
        {
            return 3;
        }

        @Override
        public CharSequence getPageTitle(int position) 
        {
            switch(position)
            {
                case 0:
                {
                    return "Tab1";
                }
                case 1:
                {
                    return "Tab2";
                }
                case 2:
                {
                    return "Tab3";
                }
                default:
                {
                    return "Section " + (position + 1);
                }
            }
        }
    }
    public static class LaunchpadSectionFragment extends Fragment
    {
        @Override
        public View onCreateView(LayoutInflater inflater, ViewGroup container,Bundle savedInstanceState)
        {
            View rootView = inflater.inflate(R.layout.fragment_section_launchpad, container, false);

            // Demonstration of a collection-browsing activity.
            rootView.findViewById(R.id.demo_collection_button).setOnClickListener(new View.OnClickListener()
            {
                @Override
                public void onClick(View view) 
                {
                    Intent intent = new Intent(getActivity(), CollectionDemoActivity.class);
                    startActivity(intent);
                }
            });

            // Demonstration of navigating to external activities.
            rootView.findViewById(R.id.demo_external_activity).setOnClickListener(new View.OnClickListener()
            {
                @Override
                public void onClick(View view)
                {
                    // Create an intent that asks the user to pick a photo, but using
                    // FLAG_ACTIVITY_CLEAR_WHEN_TASK_RESET, ensures that relaunching
                    // the application from the device home screen does not return
                    // to the external activity.
                    Intent externalActivityIntent = new Intent(Intent.ACTION_PICK);
                    externalActivityIntent.setType("image/*");
                    externalActivityIntent.addFlags(
                    Intent.FLAG_ACTIVITY_CLEAR_WHEN_TASK_RESET);
                    startActivity(externalActivityIntent);
                }
            });
            return rootView;
        }
    }

    /**
     * A dummy fragment representing a section of the app, but that simply displays dummy text.
     */
    public static class DummySectionFragment extends Fragment
    {
        public static final String ARG_SECTION_NUMBER = "section_number";

        @Override
        public View onCreateView(LayoutInflater inflater, ViewGroup container, Bundle savedInstanceState)
        {
            View rootView = inflater.inflate(R.layout.fragment_section_dummy, container, false);
            Bundle args = getArguments();
            ((TextView) rootView.findViewById(android.R.id.text1)).setText(getString(R.string.dummy_section_text, args.getInt(ARG_SECTION_NUMBER)));
            return rootView;
        }
    }
    public class CustomView extends View
    {
        public CustomView(Context context)
        {
            super(context, null);
        }
    } 
}

tab_layout.xml

<?xml version="1.0" encoding="utf-8"?>
<LinearLayout xmlns:android="http://schemas.android.com/apk/res/android"
    android:layout_width="match_parent"
    android:layout_height="match_parent"
    android:orientation="vertical" >

  <TextView
              android:id="@+id/nieuws_tab_layout"
              android:layout_width="match_parent"
              android:layout_height="wrap_content"              
              android:text="@string/nieuws"
              android:gravity="center_vertical"
              android:layout_marginTop="15dp"
              android:textColor="@android:color/white"
              android:textStyle="bold"
              android:background="@android:color/black"
              />
</LinearLayout>
Community
  • 1
  • 1
Shishi
  • 601
  • 2
  • 8
  • 27
  • Is this within an Activity? Try using this instead of context (which seems to be an instance that you have not declared) – nKn Jan 24 '14 at 14:40
  • Yes this is in an FragmentActivity which implements ActionBar.TabListener using this does solve the error but it doesn't apply my style to my tab – Shishi Jan 24 '14 at 14:47
  • Then you'll have to call getActivity() instead of context. I recommend reading @desseim's answer as you may find it interesting. – nKn Jan 24 '14 at 14:49
  • I want to give each tab a different color and the selected tab a different textcolor. As for the indicator I would like a line in the same color as the selected tab. (the line should go beneath all tabs like with the hairline in the actionbar generator) – Shishi Jan 24 '14 at 14:57
  • It'll be easier to help you if you also paste the code where you initialize your tabs and tab bar. – desseim Jan 24 '14 at 14:58
  • You can accomplish this relatively easily defining every tab of the same color, and then add an onTabChangedListener() to your TabHost, so if it triggers, you know which tab is the current, you may access to the TabWidget of the TabHost and set it a drawable (you may even do this programatically without specifying it in the layout file) – nKn Jan 24 '14 at 15:00
  • I thought TabHost extended a different activity than the viewpager I use I have also been reading TabHost codes and it extends TabActivity instead of FragmentActivity – Shishi Jan 24 '14 at 15:05
  • You're talking about the action bar in your question ; `TabActivity` / `TabHost` is a different way to implement tabs... – desseim Jan 24 '14 at 15:09
  • Regarding the example picture: how should the selected tab look ? Should it be the same as when not selected ? – desseim Jan 24 '14 at 20:47
  • @desseim In the example picture red is selected when selected all the bottomlines of the tabs should turn into the color of the selected tab in this case red – Shishi Jan 25 '14 at 09:24

3 Answers3

7

Just set your custom view at the tab creation time, something like:

final Tab firstTab = actionBar.newTab()
                              .setText(mAppSectionsPagerAdapter.getPageTitle(0))
                              .setCustomView(R.id.custom_tab_view_red);
final Tab secondTab = actionBar.newTab()
                               .setText(mAppSectionsPagerAdapter.getPageTitle(1))
                               .setCustomView(R.id.custom_tab_view_blue);
// etc

actionBar.addTab(firstTab);
actionBar.addTab(secondTab);
// etc

in inCreate().

You'll also have to define Views corresponding to the above ids in your xml layout file (and not styles).

Or, if you want to create the view directly:

final View firstCustomView = new CustomView(this);
firstCustomView.setBackgroundColor(Color.BLUE);  // or with drawable or resource
final Tab firstTab = actionBar.newTab()
                              .setText(mAppSectionsPagerAdapter.getPageTitle(0))
                              .setCustomView(firstCustomView);
actionBar.addTab(firstTab);
// then same for other tabs, just with another color

Leaving the below information for reference:

To define one such view, you need to specify it an Android Context. This is usually the Activity where the tabs will be displayed. Supposing that you initialize your tabs in an Activity, simply pass the Activity instance as a Context:

ctv = new CustomView(this, R.attr.tabStyleAttr);

if from inside the Activity, or for example:

ctv = new CustomView(getActivity(), R.attr.tabStyleAttr);

if from inside a Fragment, etc.

As for setting a specific style for action bar tabs, no need to go create a custom view programmatically as you're trying to. Read up a little about the action bar first, then check the example they provide. As you can see, you'll be able to specify the tab style in xml:

In your manifest file, you can apply the theme to your entire app:

<application android:theme="@style/CustomActionBarTheme" ... />

Or to individual activities:

<activity android:theme="@style/CustomActionBarTheme" ... />

for example.

For a complete example matching perfectly your use case, see this Android doc article: https://developer.android.com/training/basics/actionbar/styling.html#CustomTabs . Notice the usage of state-lists to achieve the "when selected style".

desseim
  • 7,968
  • 2
  • 24
  • 26
  • I'm not trying to use a whole theme as it would apply on all tabs. I want to apply a style to a individual tab.Using this gives a warning saying ctv is not used. using getActivity gives a error saying getActivity is undefined – Shishi Jan 24 '14 at 14:53
  • As I wrote `getActivity()` is used from inside a `Fragment`, if you're in an `Activity` just use `this`. Furthermore, looking at the code you added, you construct a `View` and affect it to a variable (`ctv`), but that's all. You need to do something with it then, for example apply it as the view for a given tab. – desseim Jan 24 '14 at 14:57
  • I forgot to set the view indeed. Now that I have set the view it still doesn't change it to my color settings. – Shishi Jan 24 '14 at 15:03
  • 2 things: replace `@attr/actionBarTabStyle` key with `android:actionBarStyle` in your styles xml ; make sure you apply `Theme.Ab` as a style of either the app or the `Activity` (and the right `Activity`, not another one) as I highlighted at the end of my answer ; now you should at least see your custom drawables as background of background tabs. After that you can try to set a specific style for highlighted tabs. – desseim Jan 24 '14 at 15:23
  • @Shishi see the link I added at the end of my answer too, you should find everything you need there. – desseim Jan 24 '14 at 15:32
  • I have added my onCreate function in which I initialize my tabs. I have seen the documents but I couldn't find anything per tab specific. All 3 tabs behave the same. – Shishi Jan 24 '14 at 17:46
  • I have added some extra information and I made a example picture – Shishi Jan 24 '14 at 18:12
  • @Shishi See the updated top of my answer, it should allow to do what you're trying to do. And don't touch the tab view in the onSelected callback, remove that. – desseim Jan 24 '14 at 23:02
  • Both examples causes the app to crash I modified it doing this : `Tab tab = actionBar.newTab().setText(mAppSectionsPagerAdapter.getPageTitle(i)).setTabListener(this).setCustomView(R.layout.nieuws_tab_layout); actionBar.addTab(tab);` as for the other one `actionBar.newTab().setText(mAppSectionsPagerAdapter.getPageTitle(0)) .setTabListener(this).setCustomView(firstCustomView); ` – Shishi Jan 25 '14 at 10:19
  • as you can see I can now use the TextViews to cover the tabs color but it wont fill the tab. As for the hairline I would probably be able to use a ImageView below all TextViews so the last problem to solve would be to fill the tab. – Shishi Jan 25 '14 at 10:27
  • @Shi To "fill" the tab with the background color set the background of the root layout (in your example the `LinearLayout`), here you just set the background of the `TextView` which doesn't expand to the whole area of the tab. For the line, retrieve each tab and update their layout in `onTabSelected()`. This is starting to drift quite a lot so if you have further questions e.g. regarding the layout of your custom view I'd suggest you open new questions about each of your problems :) Feel free to comment or update here though if you still have questions about "How to customize individual tabs" – desseim Jan 25 '14 at 15:36
0

if another one using TabLayout as in my case i used this snippet

tabLayout.setOnTabSelectedListener(new TabLayout.OnTabSelectedListener() {
        @Override
        public void onTabSelected(TabLayout.Tab tab) {
            tab.setCustomView(R.layout.chat_tab);

        }

        @Override
        public void onTabUnselected(TabLayout.Tab tab) {
            tab.setCustomView(null);
        }

        @Override
        public void onTabReselected(TabLayout.Tab tab) {

        }
    });
Mostafa Anter
  • 3,445
  • 24
  • 26
  • i am using tabLayout, and i want third tab text color should be in red color irrespective of selection/not. can you help me out? – Tara Nov 01 '16 at 09:06
  • I answered below, it will be helpful for others. – Tara Nov 03 '16 at 11:41
0

I was using Tablayout, which is privided by AndroidStudio library. while adding tabs Just use setCustomView() to each and every tab which you would like to customize. something like below

    tabLayout.addTab(tabLayout.newTab().setText("FirstTab"));  // default tab
    tabLayout.addTab(tabLayout.newTab().setText("SecondTab").setCustomView(R.layout.tabview));  // Customized tab

And below is the layout design for particular Tab to fill our requirement, Here I am just makeing the Tab text color Different

<?xml version="1.0" encoding="utf-8"?>
<LinearLayout xmlns:android="http://schemas.android.com/apk/res/android"
android:orientation="vertical" android:layout_width="wrap_content"
android:layout_height="wrap_content"
android:background="@color/colorPrimaryDark">  <!-- TabLayout default color in my case -->
<TextView
    android:layout_width="wrap_content"
    android:layout_height="wrap_content"
    android:text="Procurement"
    android:textAllCaps="true"
    android:textAppearance="@android:style/TextAppearance.DeviceDefault.Small"
    android:textColor="@color/tab_selection"  <!-- textcolor which ever you like-->
    android:textStyle="bold"/>

</LinearLayout>
Tara
  • 2,598
  • 1
  • 21
  • 30
  • what if i want to apply color to single tab and another different color to another tab – Ananya Srivastav Nov 23 '16 at 11:08
  • i have given color to only one tab with setCustomView(), you can design for number of tabs. You have to define different layouts for different tabs. – Tara Nov 28 '16 at 05:36
  • Can you give me an example as a reference – Ananya Srivastav Nov 28 '16 at 06:56
  • tabLayout.addTab(tabLayout.newTab().setText("FirstTab").setcustomview(R.layout.customDesignForfirsttab)); tabLayout.addTab(tabLayout.newTab().setText("SecondTab").setCustomView(R.layout.tabview)); – Tara Nov 28 '16 at 07:30