5

I tried to draw image stroke (border) to my png image. original ph_res
(*expected 19px stroke layer style result by Photoshop)

and I found helpful script from imagemagick forum. (imagemagick discourse)

convert source.png -background '#2a7940' -alpha background -channel A -blur 9x11 stroked.png

but my best trial is far from Photoshop result. im_res

I tried many combinations of Radius*Sigma but it seems the best result from blur trick.. (-blur 9x11 for this one)

Question
* Can I have better image stroke from Imagemagick or PIL or other CLI tools?
* If so, how..?
Thank you so much for reading this question.

sngjuk
  • 927
  • 1
  • 10
  • 24
  • 1
    Your command `convert source.png -background '#2a7940' -alpha background -channel A -blur 9x11 stroked.png` does not reproduce the image you show! – fmw42 Jun 03 '19 at 19:34
  • @fmw42 Thank you for letting me know! I was using 7.0.8-47 and now I know that it has some blur issue thx! – sngjuk Jun 04 '19 at 10:28
  • 1
    `@sngjuk`. In Imagemagick 7, when blurring it will blur the alpha channel unless you add -channel rgb before -blur and then +channel afterwards. – fmw42 Jun 04 '19 at 16:55
  • 1
    Related: https://stackoverflow.com/questions/33888028/outline-a-transparent-image-using-imagick-php – Ciro Santilli OurBigBook.com Jan 20 '21 at 09:36

3 Answers3

3

When you need clean edges on an effect you create with ImageMagick, you can double the size of your input image, run the operations, then resize it back to its original input size. It takes longer to run the operations, but the result can be substantially improved. Here's an example command...

convert bomb-source.png -write mpr:in -resize 200% \
   -channel A -morphology dilate disk:38 +channel \
   -fill green -colorize 100 -resize 50% mpr:in -composite result.png

That command starts by reading the input image and storing a copy in a memory register named "mpr:in".

Then it resizes the input to 200% and uses "-morphology" to dilate the shape by about 38 pixels. That will work out to about 19 pixels after the image is reduced back to its input size.

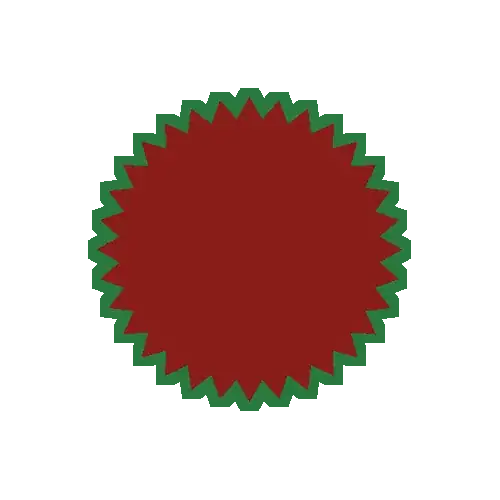
Next it colorizes that new shape to make it green and resizes it 50%, which is back to the original size.

The command finishes by bringing back that "mpr:in" copy of the original image and compositing it over the modified green piece.

Increasing the size, working on that, and decreasing it after modifying it is called "super sampling". It's a common technique that results in smoother edges, but it comes at the cost of speed.

Edited to add the output image... enter image description here

Community
  • 1
  • 1
GeeMack
  • 4,486
  • 1
  • 7
  • 10
  • It is definitely the best quality!! Thank you for helpful technique (+register usage) thank you again! – sngjuk Jun 04 '19 at 11:55
2

This might get you started:

convert bomb-source.png \
  \( +clone -alpha extract -morphology edge-out disk:19 -fill green -opaque white \) \
  -compose lighten -composite -transparent black result.png

enter image description here

The -transparent black at the end is not optimal if your central image contains black so I will think about that some more...

If you add -write stroke.png after the word disk:19 you will get a new file called stroke.png that shows you what the morphology is doing.

Mark Setchell
  • 191,897
  • 31
  • 273
  • 432
2

Here is another way where I use -blur to anti-alias the stroke in ImageMagick.

Input:

enter image description here

Line1 - read input
Line2 - clone it and make it fully opaque green
Line3 - clone the input, extract the alpha channel, dilate it to 19 or 20, then blur by 0x1 to antialias and use -level to remove the inner side of the blur
Line4 - put the dilated alpha into the alpha channel of the green image
Line5 - remove the temporary clones, swap the remaining two images and overlay the original over the green
Line6 - write the output

convert bomb-source.png \
\( -clone 0 -alpha off -fill green -colorize 100 \) \
\( -clone 0 -alpha extract -morphology dilate disk:20 -blur 0x1 -level 50x100% \) \
\( -clone 1,2 -compose copy_opacity -composite \) \
-delete 1,2 +swap -compose over -composite \
result.png

enter image description here

If you need more antialiasing, increase the blur to 0x2.

For ImageMagick 7, replace convert with magick.

fmw42
  • 46,825
  • 10
  • 62
  • 80
  • It is the best quality with reasonable processing time! thank you so much from the other side of the earth!! – sngjuk Jun 04 '19 at 12:06