I goggled a lot of time and found that running a Linux kernel is a solvable way and feasible solution.
Vagrant
It is a tool for building and managing virtual machine environments in a single workflow. The main reason why I argue you using vagrant is that it is not too heavy and does not swallow much of your computer resources. I believe you get through Vagrant documentation that will allow you to launch a Linux based machine on your physical machine.
Let's assume that the host machine is assigned IP 192.168.1.2 and the virtual machine has the IP address as 192.168.1.10, and make sure that the host and guest machine could see each other. Please read thoroughly Networking section to customise the network configuration.
Verifying connection between host and guest machine
Install MySQL Server
MySQL is a database management system. Basically, it will organise and provide access to databases where our site can store information.
Open a terminal in the machine has been set up from the above step. Run the following command:
sudo apt-get install mysql-server-5.6
Notes: It's up to the version of Linux distribution installed, the above command would be adjustable to suit your need. For install, I used the core of Ubuntu 14.04, see the link.
During the installation, your server will ask you to select and confirm a password for the MySQL root user. This is an administrative account in MySQL that has increased privileges.
Verifying the installation
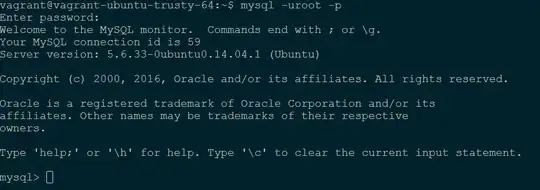
From a terminal in the guest machine (i.e. the virtual machine), run the following command:
mysql -u root -p
will ask the MySQL password, then provide the one you have set up during MySQL Server installation. The following is the screenshot if you feed correct information to MySQL server.
Turn MySQL Server remotely accessible
Because we need a centralised database server where other computers could access and connect to the database of interest. Again, open a terminal and run the following MySQL commands:
GRANT ALL PRIVILEGES ON *.* TO 'root'@'192.168.1.2' IDENTIFIED BY PASSWORD '*4ACFE3202A5FF5CF467898FC58AAB1D615029441' WITH GRANT OPTION;
GRANT PROXY ON ''@'' TO 'root'@'192.168.1.2' WITH GRANT OPTION;
FLUSH PRIVILEGES;
which 192.168.1.2 is the IP address of the host machine and hashed string of password gets from user table in mysql database.
Okay. You might take a rest and enjoy your drink if there is no issue so far.
Verifying the remote access
From a terminal on the host machine, fire up the following command:
mysql -h192.168.1.2 -uroot -p
which is asking you to enter the password. If the root credential is correct, you would see a screenshot like the above one. One thing needs to be paid attention is to add -h192.168.1.2 following mysql command because we are not in the machine where MySQL server is installed.
All in all, we have set up a MySQL server used for both host and guest machine. In reality, if I have another machine assigned 192.168.1.3 can also connect to the database server and exchange data between server and client.
