2

enter image description here

I have a SplitViewVC that has a MasterNavVC who's root is a TableViewVC. The SplitViewVC also has a DetailNavVC that has a WhiteVC as it's root. I have several other view controllers that I want to get through from my TableViewVC: RedVC, GreenVC, BlueVC, and PinkVC. I didn't want to use all those IB segue connections so I want to push to them programmatically. The TableView's cell has a segue that pushes on the DetailNavVC thus all the other vcs have to go through it. I'm using this for iPad and iPhone adaptability.

The problem is in the TableView's didSelect method, when I try to push to any of the color vcs, the WhiteVC always shows pushing forward and popping when going backwards:

eg.

Push- TableView -> WhiteVC -> RedVC

Pop- RedVC -> WhiteVC -> TableView

I want

Push- TableView -> RedVC

Pop- RedVC -> TableView

I tried to remove the WhiteVC but I kept getting the exception:

Cannot display a nested UINavigationController with zero viewControllers

So I added the WhiteVC to silence that error but none of the methods below worked.

  func tableView(_ tableView: UITableView, didSelectRowAt indexPath: IndexPath) {

  switch indexPath.row{
        case 0:
            //this shows the WhiteVC while pushing and popping
            let redVC = storyboard?.instantiateViewController(withIdentifier: "RedVC") as! RedVC
            navigationController?.pushViewController(redVC, animated: true)
        break
        case 1:
           //this shows the WhiteVC while pushing but removes the backButton from the GreenVC
           let greenVC = storyboard?.instantiateViewController(withIdentifier: GreenVC") as! GreenVC
           navigationController?.setViewControllers([greenVC], animated: true)
        break
        case 2:
           //this has the same effect as case 1
           let blueVC = storyboard?.instantiateViewController(withIdentifier: BlueVC") as! BlueVC
           let root = detailNavController(rootViewController: blueVC)
           navigationController?.pushViewController(root, animated: true)
        break
        case 3:
            //this shows the WhiteVC pushing but doesn't show it popping
            let masterNav = splitViewController?.viewControllers.last as! MasterNavVC
            let detailNav = masterNav.viewControllers.last as! DetailNavVC
            let pinkVC = storyboard?.instantiateViewController(withIdentifier: "PinkVC") as! PinkVC
            detailNav.setViewControllers([pinkVC], animated: true)
        break

case 3 came the closet as the WhiteVC showed while pushing but it didn't show popping (it correctly popped to root):

Push- TableView -> WhiteVC -> PinkVC

Pop- PinkVC -> TableView

I want to programmatically push to the other color vcs (of course after tapping their selected cell) without showing the WhiteVC. How do I do that?

Lance Samaria
  • 17,576
  • 18
  • 108
  • 256
  • While i am seeking a similar solution and have no answer at present, i wanted to acknowledge the most excellent question formulation. – drew.. Jul 27 '17 at 02:08
  • @drew thanks for the compliment! I actually got some help with this months ago. I can post an answer later today if you need it. It's actually quite easy. – Lance Samaria Jul 27 '17 at 12:29
  • Lance, please do. my situation is driving me batty. I am challenged with using a SlideMenu repo that transitions to a SplitView paradigm, which must have its home left button transition back to the SlideMenu paradigm AND yet when opening, must show the root view of Apple's SplitView paradigm>> driving me batty ;) I am considering a post similar to your's to lay it out. – drew.. Jul 27 '17 at 16:04
  • @drew I'll upload what I used later tonight and send you a message. I don't know what a SildeMenu repo is but I also read that Apple wants the SplitVC to be root. I struggled with it but eventually found out that it's not necessary. I use a tabBarVC as root and each tab has a SplitVC. So like this: TabBarVC(root) > SpiltVC1 > MasNavVC1(splitVC1's root) > VC1(tableVC) > VC2 etc. I use that for each of my tabs. I programmatically add the SplitVC's DetailVC in VC1 (tableVC) and push to VC2 in didSelectRow. You also need to use the SplitDelegates. I'll explain later. – Lance Samaria Jul 27 '17 at 18:29
  • Thank you, so long as it is not too much trouble, i would love to see the solution, but, i have finally beat my beast here! It is worthy of an article i think! And yes, i quickly realized the same re SplitVCs. The repo is at GitHub at (https://github.com/dekatotoro/SlideMenuControllerSwift). Useful but complicated. – drew.. Jul 27 '17 at 19:55
  • @drew i got you – Lance Samaria Jul 27 '17 at 19:57
  • 1
    @drew something came up and I'm short on time, I'm not sure how much of a rush your in. If you want I can put a very short and straight to the point answer tonight. But if you can wait until tomorrow I can put up an answer with pics and get into the nitty gritty. It'll be a very detailed answer. I'm sure other people can use it too. I'll leave that up to you because if your pressed then I'm gonna put something up. I'm 100% going to help you because I've gotten a ton of help on SO so I'll help anyone who needs it. – Lance Samaria Jul 28 '17 at 03:29
  • at your convenience, thank you! – drew.. Jul 28 '17 at 06:43
  • @drew I'm working on this now. Do you want to know about the SplitVIewVC using just an iPad or using it on the iPhone with a traitCollection of .regular and/or .compact? – Lance Samaria Jul 31 '17 at 15:52
  • @drew sorry I took so long. I had to think this through and use photoshop. I hope I explained it well. Good luck :) – Lance Samaria Jul 31 '17 at 20:42
  • Hey Lance! My apologies .. a very tight deadline has me 15-20 hours per day.. i will return as soon as i can! Your posts are awesome. Perhaps in your efforts i may discover the answer to this post: https://stackoverflow.com/questions/45523026/uisplitview-requires-workflow-hack – drew.. Aug 05 '17 at 20:55
  • @drew.. thanks! If you need anymore help I'll try my best. Let me know ✌✌ – Lance Samaria Aug 05 '17 at 20:56

1 Answers1

0

First thing thing let me say that the Apple recommends that the SpiltVC begin as root. The problem I ran into was that if using a TabBarVC as root you would have to put that inside a containerView and then make the containerView as root to a NavVC which would be root to the SplitVC.

SplitVC > NavVC > ContainerVC > TabBarVC //this wasn't working out

I decided to use a TabBarVC as root and added a separate SplitVC to each Tab. If you look on the left side of the pic below this is how Apple's MasterDetailApp looks when started up. The right side of the scene is the layout I instead used.

enter image description here

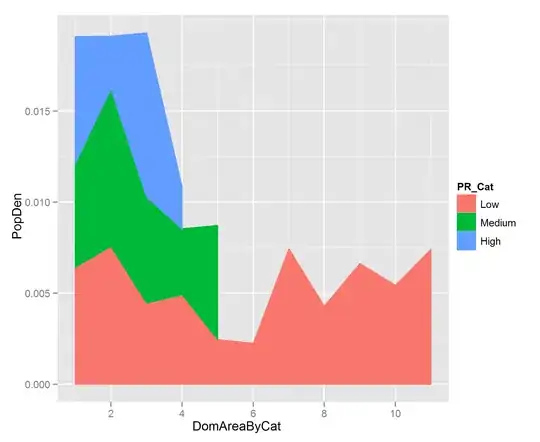
On the right side of the image I have a TabBar as root and each tab has a SplitVC and each SplitVc has it's own NavVC which itself has it's own TableVC as it's root:

           ____SplitVC -- NavVC -- TableVC  //this would be tab 0 and where we will focus
          /
         /
TabBarVC                                    //all the other color vcs I want to get to from the TableVC in tab 0
         \
          \____SplitVC -- NavVC -- TableVC

Notice on the right side of the image I didn't use include a DetailNavigationController like what's included in the MasterDetailApp.

I'm only going to focus on pushing vcs from the TabBar's first tab because you would use the same methodologies for the TabBar's second tab.

To begin in appDelegate's didFinishLaunching you would simply add the tab you want to land on first as the selectedIndex:

AppDelegate:

func application(_ application: UIApplication, didFinishLaunchingWithOptions launchOptions: [UIApplicationLaunchOptionsKey: Any]?) -> Bool {

        //I subclassed the TabBarVC with the name TabBarController

        let mainStoryboard: UIStoryboard = UIStoryboard(name: "Main", bundle: nil)
        let tabBarVC: TabBarController = mainStoryboard.instantiateViewController(withIdentifier: "TabBarController") as! TabBarController
        tabBarController.selectedIndex = 0
        window?.rootViewController = tabBarController

        window?.makeKeyAndVisible()
        return true
}

FYI here is the flow and the name of the vcs for tab 0:

TabBarContoller > TabZeroSplitVC > TabZeroNavVC > SettingsVC

Launching this way would give me the SettingsVC which on an iPad would be on the left side (master side) in split screen mode. You also have to conform to the UISplitViewControllerDelegate and in viewDidLoad you make it so that it shows split screen with a master on the left and a detail on the right.

SettingsVC: UIViewController, UISplitViewControllerDelegate{

@IBOutlet weak fileprivate var tableView: UITableView!

var colors = ["RedVC", "GreenVC", "BlueVC", "PinkVC"]

override func viewDidLoad() {
    super.viewDidLoad()

    splitViewController?.delegate = self

    //this keeps it in splitScreen mode
    splitViewController?.preferredDisplayMode = UISplitViewControllerDisplayMode.allVisible
}

func tableView(_ tableView: UITableView, numberOfRowsInSection section: Int) -> Int {
        return self.colors.count
}

func tableView(_ tableView: UITableView, cellForRowAt indexPath: IndexPath) -> UITableViewCell {
        let cell = tableView.dequeueReusableCell(withIdentifier: "ColorsCell", for: indexPath) as! ColorsCell

        cell.titleLabel?.text = self.colors[indexPath.row]
        return cell
 }

Since I didn't include a DetailNavigationController in Storyboard then the right side of the screen (detail side) would be blank. So upon launching you would get a screen that looks like this:

enter image description here

The idea is to first programmatically add a NavVC and then programmatically add the WhiteVC as it's root. That way the WhiteVC will initially show on the right side of the screen. The key is to use the splitVC's showDetailViewController(vc: UIViewController, sender: Any?) to programmatically show it. Btw it is important to add the nav as a class variable because that is what we will use to show the other colors vcs.

SettingsVC: UIViewController, UISplitViewControllerDelegate{

@IBOutlet weak fileprivate var tableView: UITableView!

var colors = ["RedVC", "GreenVC", "BlueVC", "PinkVC"]

var whiteVC: WhiteController? //the one from the storyboard

var nav: UINavigationController? //this will represent the DetailNavigationController from Apple's MasterDetailApp

override func viewDidLoad() {
    super.viewDidLoad()

    splitViewController?.delegate = self
    splitViewController?.preferredDisplayMode = UISplitViewControllerDisplayMode.allVisible

    //1st instantiate the WhiteVC that was created in storyboard
    self.whiteVC = storyboard?.instantiateViewController(withIdentifier: "WhiteController") as? WhiteController

    //2nd add it to the programmatic navigationController as it's root
    self.nav = UINavigationController(rootViewController: whiteVC!)

    //3rd use the splitVC method to show the nav on the right side of scene 
    splitViewController?.showDetailViewController(self.nav!, sender: self
}

Now upon launch the scene will look like this:

enter image description here

Now to the answer the question of how to push on any of the color vcs without including the WhiteVC. All you have to do is add whichever color vc as root to the programmatic nav that was created as a class variable. And inside the tableView's didSelectRow is where you add it and show from

func tableView(_ tableView: UITableView, didSelectRowAt indexPath: IndexPath) {

switch indexPath.row{

        case 0:
            let redVC = storyboard?.instantiateViewController(withIdentifier: "RedController") as! RedController
            self.nav = UINavigationController(rootViewController: redVC)
            splitViewController?.showDetailViewController(self.nav! , sender: self)
            break

        case 1:
            let greenVC = storyboard?.instantiateViewController(withIdentifier: "GreenController") as! GreenController
            self.nav = UINavigationController(rootViewController: greenVC)
            splitViewController?.showDetailViewController(self.nav! , sender: self)
            break

        case 2:
            let blueVC = storyboard?.instantiateViewController(withIdentifier: "BlueController") as! BlueController
            self.nav = UINavigationController(rootViewController: blueVC)
            splitViewController?.showDetailViewController(self.nav! , sender: self)
            break

        case 3:
            let pinkVC = storyboard?.instantiateViewController(withIdentifier: "PinkController") as! PinkController
            self.nav = UINavigationController(rootViewController: PinkVC)
            splitViewController?.showDetailViewController(self.nav! , sender: self)
            break

}

Now if you picked the cell that is labeled RedVC you would get this (there should be a navigationBar on top of the RedVC but I forgot to add it in Photoshop):

enter image description here

If you look inside the didSelectRow you will see the nav now has a new root which is the redVC (it was originally using the WhiteVC in viewDidLoad). Since you changed the root the WhiteVC is no longer in the hierarchy. The same thing would follow for any of the other colors. If you choose the PinkVC you would get (there should be a navigationBar on top of the PinkVC but I forgot to add it in Photoshop):

enter image description here

In any case all you have to do is set a new root for the nav. If you wanted to add that double expand arrow thing that extends the view outwards

enter image description here

You would also add it in the didSelectRow

       case 0:
            let redVC = storyboard?.instantiateViewController(withIdentifier: "RedController") as! RedController
            self.nav = UINavigationController(rootViewController: redVC)

            //these 2 lines of code are what adds the double expand arrow
            self.nav?.topViewController?.navigationItem.leftBarButtonItem = splitViewController?.displayModeButtonItem
            self.nav?.topViewController?.navigationItem.leftItemsSupplementBackButton = true

            splitViewController?.showDetailViewController(self.nav! , sender: self)
            break

            //add the same exact 2 lines for every other case

One last thing. This was a big problem I ran into and I'm sure other people may run into this since this SplitVC isn't root. Let's say on tab zero upon launch you wanted to show another vc (i.e. an OrangeVC) instead of the SettingsVC. The problem is the setup is:

TabBarContoller > TabZeroSplitVC > TabZeroNavVC > SettingsVC

Since the storyboard has the SettingsVC as TabZeroNavVC's root, you would have to change it in the appDelegate's didFinishLaunching (or your login screen etc).

The code to use it would be:

AppDelegate:

func application(_ application: UIApplication, didFinishLaunchingWithOptions launchOptions: [UIApplicationLaunchOptionsKey: Any]?) -> Bool {

        //I subclassed the TabBarVC with the name TabBarController

        let mainStoryboard: UIStoryboard = UIStoryboard(name: "Main", bundle: nil)
        let tabBarVC: TabBarController = mainStoryboard.instantiateViewController(withIdentifier: "TabBarController") as! TabBarController
        tabBarController.selectedIndex = 0

        //first you have to get to the splitVC on the first tab
        let tabZeroSplitVC = tabBarController.viewControllers![0] as! TabZeroSplitController

        //second you have to get to the navVC that's connected to the splitVC
        let tabZeroNavVC = tabZeroSplitVC.childViewControllers[0] as! TabZeroNavController

        //third instantiate the vc that you want to appear upon launch
        let orangeVC = mainStoryboard.instantiateViewController(withIdentifier: "OrangeController") as! OrangeController

        //the navVC has a method to set a new array of vcs. Just add the orangeVC in here (make sure to put it in array brackets)
        tabZeroNavVC.setViewControllers( [orangeVC], animated: true)

        window?.rootViewController = tabBarController

        window?.makeKeyAndVisible()
        return true
}

Once you launch your OrangeVC would show. Since the OrangeVC isn't a tableView you would probably want to show that full screen. Be sure to add the UISplitViewControllerDelegate and in viewDidLoad add:

OrangeVC: UIViewController, UISplitViewControllerDelegate{ 

override func viewDidLoad() {
        super.viewDidLoad()

        splitViewController?.delegate = self

        //this will hide splitScreen and will only show fullScreen
        splitViewController?.preferredDisplayMode = UISplitViewControllerDisplayMode.primaryHidden
}

You would have a fullScreen of orange upon launch instead of having a splitScreen.

Even though these links use the SplitVC as root, these are some very good blog posts about configuring a SplitVC:

SplitVC-1

SplitVC-2

SplitVC-3

SplitVC-4

SplitVC-5

SplitVC-7

Lance Samaria
  • 17,576
  • 18
  • 108
  • 256
  • hey Lance, thanks for the comments on my deleted incorrectly posted comment. I understand your thoughts of course, it is second nature to grab the navcontroller in question etc to push/present. I do that often, and did so for the iPhone use case (i break up every didSelect cell func into branches to manage the differing layout requirements. My iPhone branch was coded in 30 seconds, worked fine, as mentioned. The iPad branch, where the UISplitViewController manages everything, the nav controller on the detail view is nil. I test this many differing ways. It is nil, thus my dilemma. – drew.. Aug 06 '17 at 23:39
  • @drew I'm not sure how it can be nil if your using a newly created nav. If you programmatically create a nav in prepare or didSelect how can it become nil? Have you tried what I suggested? This is the method I'm using on 4 different tabs with 4 different SplitVCs. I'm also using it throughout my app where I create a nav on the fly to present or push a vc. What is your storyboard layout for the vcs your using? – Lance Samaria Aug 06 '17 at 23:43
  • as mentioned, i have not had time to review your fabulous effort as yet, and in there, i'm sure a solution exists. I will update my separate thread later on this subject. thank *you* – drew.. Aug 06 '17 at 23:50
  • @ drew ok, once you try it I'm sure it will work. But remember in your didSelect, after you instantiate the new root to the class var nav you created, you HAVE to use self.splitViewController?.showDetailViewController(self.nav! , sender: self) to show it. If you don't call that then it won't show. – Lance Samaria Aug 06 '17 at 23:53
  • Therein lies the issue, in this use case, i am *not* wanting to show as a detail within the SplitView world on the iPad. iPhone is fine as it follows the push paradigm. I am presenting a fullscreen pdf viewer that must be unfettered, and thus, again, my dilemma. I am sure i am just missing something simple (i usually do). Thanks dude.. – drew.. Aug 06 '17 at 23:57
  • @drew.. ah, first look at the name of the method "showDetailViewController(self.nav! , sender: self)", the SplitVC doesn't push, it only shows the detail. That's why in Apple's MasterDetail App the tableVC cell has a segue to the DetailNav. If you want to include push functionality, since the SplitVC only "shows" you have to put the vc you want to show in a nav. So it's like this: root > SplitVC > masterNav > tableView > didSelect > programmatic nav(root: vcToShow) > showDetailViewController(programmatic nav! , sender: self). I was confused at first to until I took a look at the method name. – Lance Samaria Aug 07 '17 at 00:05
  • @drew answer this 1 question, I will update the answer if needed. The vc that you want to "push/show" on in didSelect, do you want that to show in full screen mode or splitScreen mode? I'm using both, I didn't include it because I didn't think anyone needed it. I can show you that also as it's easy – Lance Samaria Aug 07 '17 at 00:07
  • Let us [continue this discussion in chat](http://chat.stackoverflow.com/rooms/151224/discussion-between-drew-and-lance-samaria). – drew.. Aug 07 '17 at 00:12