0

I have a maven webservice and I want to deploy on the cloud like amazon or any hosting site. What changes are required with my project for this work?

I simply tried to deploy my project on "jelasic.cloud", by copy the project folder==> and compress into zip ==> upload on jelastic and then deploy but it gives me 404 error.

But when I test to deploy same project in eclipse tomcat it works fine. But how to do on cloud?

this is my simple maven webservice:

@Path("myresource")

    public class MyResource {


        @GET
        @Produces(MediaType.TEXT_PLAIN)
        public String getIt() {
            return "hellow world!";
        }
    }

pom.xml file:

<project xmlns="http://maven.apache.org/POM/4.0.0" xmlns:xsi="http://www.w3.org/2001/XMLSchema-instance"
         xsi:schemaLocation="http://maven.apache.org/POM/4.0.0 http://maven.apache.org/maven-v4_0_0.xsd">

    <modelVersion>4.0.0</modelVersion>

    <groupId>org.start.project</groupId>
    <artifactId>smsdetails</artifactId>
    <packaging>war</packaging>
    <version>0.0.1-SNAPSHOT</version>
    <name>smsdetails</name>

    <build>
        <finalName>smsdetails</finalName>
        <plugins>
            <plugin>
                <groupId>org.apache.maven.plugins</groupId>
                <artifactId>maven-compiler-plugin</artifactId>
                <version>2.5.1</version>
                <inherited>true</inherited>
                <configuration>
                    <source>1.7</source>
                    <target>1.7</target>
                </configuration>
            </plugin>
        </plugins>
    </build>

    <dependencyManagement>
        <dependencies>
            <dependency>
                <groupId>org.glassfish.jersey</groupId>
                <artifactId>jersey-bom</artifactId>
                <version>${jersey.version}</version>
                <type>pom</type>
                <scope>import</scope>
            </dependency>
        </dependencies>
    </dependencyManagement>

    <dependencies>
        <dependency>
            <groupId>org.glassfish.jersey.containers</groupId>
            <artifactId>jersey-container-servlet-core</artifactId>
            <!-- use the following artifactId if you don't need servlet 2.x compatibility -->
            <!-- artifactId>jersey-container-servlet</artifactId -->
        </dependency>
        <dependency>
            <groupId>org.glassfish.jersey.media</groupId>
            <artifactId>jersey-media-moxy</artifactId>
        </dependency>
    </dependencies>
    <properties>
        <jersey.version>2.23.1</jersey.version>
        <project.build.sourceEncoding>UTF-8</project.build.sourceEncoding>
    </properties>
</project>

index.jsp file:

<html>
<body>
    <h2>Jersey RESTful Web Application!</h2>
    <p><a href="webapi/myresource">Jersey resource</a>
    <p>Visit <a href="http://jersey.java.net">Project Jersey website</a>
    for more information on Jersey!
</body>
</html>

web.xml file:

<web-app version="2.5" xmlns="http://java.sun.com/xml/ns/javaee" xmlns:xsi="http://www.w3.org/2001/XMLSchema-instance" xsi:schemaLocation="http://java.sun.com/xml/ns/javaee http://java.sun.com/xml/ns/javaee/web-app_2_5.xsd">
    <servlet>
        <servlet-name>Jersey Web Application</servlet-name>
        <servlet-class>org.glassfish.jersey.servlet.ServletContainer</servlet-class>
        <init-param>
            <param-name>jersey.config.server.provider.packages</param-name>
            <param-value>org.start.project.smsdetails</param-value>

        </init-param>
        <load-on-startup>1</load-on-startup>
    </servlet>
    <servlet-mapping>
        <servlet-name>Jersey Web Application</servlet-name>
        <url-pattern>/webapi/*</url-pattern>
    </servlet-mapping>
</web-app>

this code is running fine in eclipse.
Cœur
  • 37,241
  • 25
  • 195
  • 267
xyz rety
  • 671
  • 2
  • 11
  • 22

1 Answers1

1

The creation and deployment of the java web-application via Maven Plugin in Jelastic Cloud is very simple. Let's perform some simple steps.

Step 1 - Create your environment

Please login to your dashboard and click the "New Environment".

In the environment's settings window, please select Java and Tomcat 7 Server, enter a unique name of the environment, for example - "maventest" and specify the number of cloudlets (available resources). Then press "Create".

Your environment will be created in few minutes.

Step 2 - Create web application's project via IntelliJ IDEA.

Please, open the development environment IntelliJ IDEA on your machine (the application must be installed) and create a new project via menu "File -> New". In the window that appears, please, select type of Project's SDK (for example: v1.8), check the box "Create from archetype" and select "maven-archetype-webapp:Release" in the list below.

Then press "Next" button.

Fill the fields "GroupID" and "ArtifactID" with the text, for example, "demo-jelastic".

Next, please specify Maven home directory folder (Bundled (Maven 3) is recommended) and mark the checkboxes as in the screenshot below.

Please save the path to the file settings.xml. Later this will come in handy.

Now enter your project's name, specify project's folder and press "Finish".

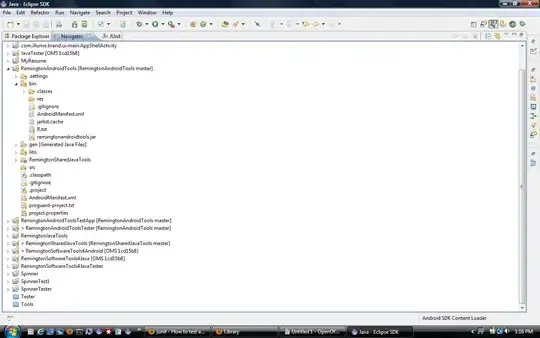
Now you need to wait until the project structure will be created. It, usually, takes about five minutes. You can follow the process in the terminal window inside IDE. After completion, the project structure will look like this:

Step 3 - Edit the file web.xml

Please, open web.xml file inside of your project and replace its contents with the text below:

<?xml version="1.0" encoding="UTF-8"?>
<web-app xmlns="http://www.oracle.com/webfolder/technetwork/jsc/xml/ns/javaee"
         xmlns:xsi="http://www.w3.org/2001/XMLSchema-instance"
         xsi:schemaLocation="http://www.oracle.com/webfolder/technetwork/jsc/xml/ns/javaee
         http://www.oracle.com/webfolder/technetwork/jsc/xml/ns/javaee/web-app_3_1.xsd"
         version="3.1">
  <welcome-file-list>
    <welcome-file>index.jsp</welcome-file>
  </welcome-file-list>
</web-app>

Be careful, links can be highlighted in red. In this case, please go to "File -> Settings -> Languages & Frameworks -> Schemas and DTDs" and add the necessary links to "Ignored Schemas and DTDs". Example below:

Step 4 - Edit the file settings.xml

Please, open the terminal of your OS and go to the folder "/home/$username$/.m2" (the correct path to the folder we saved earlier). Open the file settings.xml (or create one if the file does not exist). Replace its contents with the following:

<?xml version="1.0" encoding="UTF-8"?>
<settings xmlns="http://maven.apache.org/SETTINGS/1.0.0"
          xmlns:xsi="http://www.w3.org/2001/XMLSchema-instance"
          xsi:schemaLocation="http://maven.apache.org/SETTINGS/1.0.0 http://maven.apache.org/xsd/settings-1.0.0.xsd">
  <profiles>
    <profile>
      <id>jelastic</id>
      <properties>
        <jelastic.username>[insert your Jelastic user name]</jelastic.username>
        <jelastic.password>[insert your Jelastic password]</jelastic.password>
      </properties>
    </profile>
  </profiles>
</settings>

Please, specify login and password to your dashboard inside directives "jelastic.username" and "jelastic.password" and don't forget to save the changes.

Step 5 - Edit the file pom.xml

Please, return back to the project's structure and select the file pom.xml. Replace its contents with the following:

<project xmlns="http://maven.apache.org/POM/4.0.0" xmlns:xsi="http://www.w3.org/2001/XMLSchema-instance"
    xsi:schemaLocation="http://maven.apache.org/POM/4.0.0 http://maven.apache.org/maven-v4_0_0.xsd">
    <modelVersion>4.0.0</modelVersion>
    <groupId>demo-jelastic</groupId>
    <artifactId>demo-jelastic</artifactId>
    <packaging>war</packaging>
    <version>1.0-SNAPSHOT</version>
    <name>demo-jelastic Maven Webapp</name>
    <url>http://maven.apache.org</url>
    <dependencies>
      <dependency>
        <groupId>junit</groupId>
        <artifactId>junit</artifactId>
        <version>3.8.1</version>
        <scope>test</scope>
      </dependency>
    </dependencies>
    <build>
      <finalName>demo-jelastic</finalName>
    </build>
    <pluginRepositories>
      <pluginRepository>
        <id>sonatype-oss-public</id>
        <url>https://oss.sonatype.org/content/groups/public</url>
        <releases>
          <enabled>true</enabled>
        </releases>
        <snapshots>
          <enabled>true</enabled>
        </snapshots>
      </pluginRepository>
    </pluginRepositories>
    <profiles>
      <profile>
        <id>jelastic</id>
        <build>
          <plugins>
            <plugin>
              <groupId>com.jelastic</groupId>
              <artifactId>jelastic-maven-plugin</artifactId>
              <version>1.7</version>
              <configuration>
                <api_hoster>[INSERT YOUR HOSTER'S API ADRESS]</api_hoster>
                <context>ROOT</context>
                <email>[YOUR EMAIL]</email>
                <environment>[ENVIRONMENT NAME]</environment>
                <password>[PASSWORD]</password>
              </configuration>
              <executions>
                <execution>
                  <phase>install</phase>
                  <goals>
                    <goal>deploy</goal>
                  </goals>
                </execution>
              </executions>
            </plugin>
            <plugin>
              <groupId>org.apache.maven.plugins</groupId>
              <artifactId>maven-install-plugin</artifactId>
              <version>2.4</version>
              <executions>
                <execution>
                  <phase>none</phase>
                </execution>
              </executions>
            </plugin>
          </plugins>
        </build>
      </profile>
    </profiles>
  </project>

Inside "configuration" directive please specify the following directives:

"api_hoster" - URL to your hoster's dashboard.

"email" and "password" - credentials, which are used to log into the dashboard.

"environment" - the name of the previously created environment (Step 1).

Save the changes (File -> Save all).

Step 6 - Deploy your web application in Jelastic Cloud.

On the "Maven Projects" panel, select the profile "Jelastic" and "Install" in the lifecycle's list.

Press "Run Maven Build" button and watch for process inside IDE's terminal. As a result, our simple web application running inside Jelastic Cloud.

.

Virtuozzo
  • 1,993
  • 1
  • 10
  • 13