1

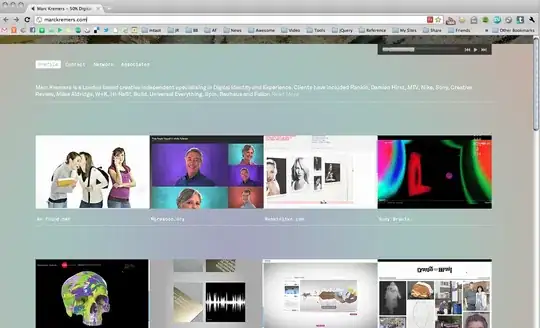
I am developing a cocoa application. It contains a toolbar having some feature buttons. Just like Reeder.

I want to resize the toolbar section while resizing the split view. Something works like below. How to implement this kind of feature?

Any one can help me or give some suggestions will be appreciated.

I am developing with XCode7, Swift and Storyboard.

enter image description here

enter image description here

Eric Aya
  • 69,473
  • 35
  • 181
  • 253
morphinewan
  • 434
  • 2
  • 6
  • 17

3 Answers3

5

Obviously there isn't any way to add a splitView to the toolbar itself and i suspect what we see in reeder is not a standard toolbar. In anycase to get this, i did the following

  1. Hidden titlebar, transparent toolbar and fullscreen view on main controller

Add to MainWindowController ViewDidLoad

  1. Add custom views with a height of 38 to the very top of each of your "sourcelist (sidebar), contentlist (index list) and default area of your SplitViewController splitView items. Then add buttons to this splitView

Do the same for the others

  1. This is what it should look like on the main window

MainWindow View Resized

  1. If you want to get the complete toolbar look. create an outlet to all your customView with the 37 point height (the ones to which you added the buttons) and customize the background, adding a gradient and a bottom border enter image description here enter image description here
stone
  • 2,192
  • 16
  • 26
  • Update for Swift 5. `self.window!.titleVisibility = NSWindow.TitleVisibility.hidden self.window!.titlebarAppearsTransparent = true self.window!.styleMask.insert([.fullSizeContentView ])` – ervinbosenbacher Aug 07 '21 at 12:14
1

I've adapted livingstonef's implementation for Swift 3 and also added the missing NSBezierPath extension:

import Cocoa

@IBDesignable class ToolbarCustomView: NSView {

    override func draw(_ dirtyRect: NSRect) {
        super.draw(dirtyRect)

        //The background
        let startingColor = NSColor(red: 232/256, green: 230/256, blue: 232/256, alpha: 1)
        let endingColor = NSColor(red: 209/256, green: 208/256, blue: 209/256, alpha: 1)
        let gradient = NSGradient(starting: startingColor, ending: endingColor)

        gradient?.draw(in: self.bounds, angle: 270)

        //The bottom border
        let borderPath = NSBezierPath()
        let startingPoint = NSPoint(x: dirtyRect.origin.x, y: 0)
        let stoppingPoint = NSPoint(x: dirtyRect.width, y: 0)

        borderPath.move(to: startingPoint)
        borderPath.line(to: stoppingPoint)

        let shapeLayer = CAShapeLayer()

        self.layer?.addSublayer(shapeLayer)

        shapeLayer.path = borderPath.cgPath
        shapeLayer.strokeColor = NSColor(red: 180/256, green: 182/256, blue: 180/256, alpha: 0.6).cgColor
        shapeLayer.fillColor = .clear
        shapeLayer.lineWidth = 1
    }
}

extension NSBezierPath {

    public var cgPath: CGPath {
        let path = CGMutablePath()
        var points = [CGPoint](repeating: .zero, count: 3)

        for i in 0 ..< self.elementCount {
            let type = self.element(at: i, associatedPoints: &points)
            switch type {
            case .moveToBezierPathElement:
                path.move(to: points[0])
            case .lineToBezierPathElement:
                path.addLine(to: points[0])
            case .curveToBezierPathElement:
                path.addCurve(to: points[2], control1: points[0], control2: points[1])
            case .closePathBezierPathElement:
                path.closeSubpath()
            }
        }

        return path
    }
}
Felix
  • 776
  • 8
  • 16
  • 1
    You actually don't even need the Bezier to set the border on the toolbar , you can just add a border to the layer and it works fine. Also you may need to change the gradient of the toolbar when the the Window is no longer the Key window. Here is an updated custom Toolbar that works in Swift 3.0 https://gist.github.com/livingstonef/04bc9344a501cf198db13d1e48a6addd – stone Sep 08 '16 at 14:01
  • Thanks for the update, the key window logic works fine. I don't get a layer border unless I also set the border width to 1. But then the border is on all sides of the view, not just at the bottom. Am I missing something? – Felix Sep 08 '16 at 15:31
-1

it's all about constraints

If toolbar is in splitview :

On your toolbar set constraints "spacing to nearest neighbor", for instance 0 for left and right Then the button must have also a "spacing to nearest neighbor" to the toolbar, for instance 8 at right

edit: see button here to add constrains http://oi63.tinypic.com/2s7szgi.jpg

phimage
  • 274
  • 1
  • 6
  • Sorry I can't understand what you mean. Which button do you talked about? I want to know is how can I make the segmented control moving with the divider of split view. They seem to be aligned to right. I don't know if they can be added any constraints by each other. Thank you very much. If you can give me some more help will be appreciated. – morphinewan Jan 22 '16 at 08:41
  • At the bottom you can set constrains to each selected object http://oi63.tinypic.com/2s7szgi.jpg – phimage Jan 22 '16 at 08:58
  • 1. Controllers in toolbar can't be added any constrains. 2. SplitView below and the toolbar don't even belong to the same parent view. How can I add constrains to them? – morphinewan Jan 22 '16 at 09:19
  • constrains are not on controller, but on view If your toolbar is not in splitview you can try "leading" constrains to align ratight (or without storyboard listen to splitview change and update toolbar view ) You can selected a view, maintain Ctrl and move the arrow to the other view – phimage Jan 22 '16 at 09:22
  • Sorry for my poor english. What I mentioned, toolbar is the app main toolbar. And split view is the window's content view. I think they can't use constraint together. – morphinewan Jan 22 '16 at 09:25