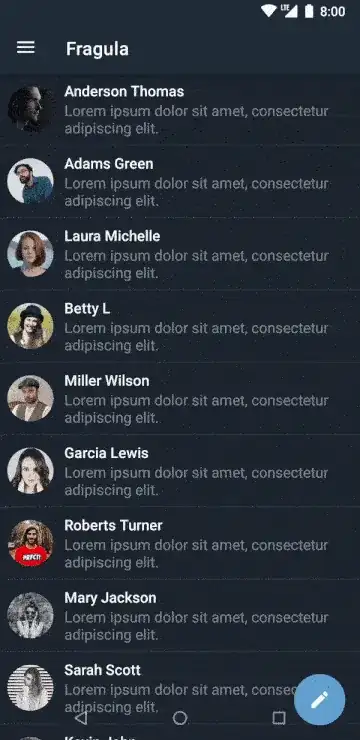
How to swipe to previous activity using gesture and animation like in Telegram and Tinder app?
-
1How do you know that those are activities, and not fragments? – CommonsWare May 28 '15 at 19:09
-
1ok, how to do this with fragments? – Дмитрий Колмогоров May 29 '15 at 07:02
4 Answers
Telegram is using it's own created fragments.They Created a class named ActionBarLayout which is basically a FrameLayout and is added to the main Activity and the fragment is just a view class (called TelegramFragment) that is added to the ActionBarLayout (they are kept in a list and much faster than normal fragments (with a bit less features).
To do the animation , they just animate the added view.
- 3,798
- 3
- 29
- 44
-
Hi @snaky , I`m studiying telegram animations over 2months to apply same animations on my android application. I only need "in" and "out" animations like when we click on any chat inside DialogFragment. I wont implement all ActionBarLayout functionalities like fragmentcontainer and stackcontainer (I know this functionalities is very important ) My only question is : Only with ActionBarLayout.startLayoutAnimation and ActionBarLayout.onSlideAnimationEnd I will got the same telegram animation ? with same mellowness? – Arthur Melo Jun 07 '16 at 05:25
there is a good library on github where I gave my contribute: it handles this feature both with activities and fragments.
- 107
- 1
- 7
-
While this link may answer the question, it is better to include the essential parts of the answer here and provide the link for reference. Link-only answers can become invalid if the linked page changes. – eden Jan 27 '18 at 20:20
-
While this link may answer the question, it is better to include the essential parts of the answer here and provide the link for reference. Link-only answers can become invalid if the linked page changes. - [From Review](/review/low-quality-posts/18643790) – eden Jan 27 '18 at 20:20
-
This is a library (Slidr), the link is to github, where it's located. I cannot answer by writing the entire code of the library here and moreover it's not necessary a how-to introduction about the usage because it's well explained on the readme. – GabrieleG Feb 01 '18 at 11:12
Actually all you have to do is put this OnCreate:
getWindow().getDecorView().setBackgroundResource(android.R.color.transparent);
MIN_DISTANCE = TypedValue.applyDimension(TypedValue.COMPLEX_UNIT_DIP, 25, this.getResources().getDisplayMetrics());
rootView = (ViewGroup) ((ViewGroup) this .findViewById(android.R.id.content)).getChildAt(0);
rootView.post(new Runnable() { @Override public void run() {

        rootWidth = rootView.getWidth();
    } });
}
// Custom Variables
ViewGroup rootView ;
int rootWidth;
boolean enableSwipe= false;
boolean lockSwipe = false;
float downX;
float downY;
float MIN_DISTANCE ;
// Detect touch Events
 @Override public boolean dispatchTouchEvent(MotionEvent event) {
switch(event.getAction()) {
    case MotionEvent.ACTION_DOWN:
    downX = event.getRawX();
    downY =event.getRawY();
    enableSwipe = false;
    lockSwipe = false;
    //convert activity to transparent

    try {   java.lang.reflect.Method getActivityOptions = Activity.class.getDeclaredMethod("getActivityOptions"); getActivityOptions.setAccessible(true); Object options = getActivityOptions.invoke(this); Class<?>[] classes = Activity.class.getDeclaredClasses(); Class<?> translucentConversionListenerClazz = null; for (Class clazz : classes) { if (clazz.getSimpleName().contains("TranslucentConversionListener")) { translucentConversionListenerClazz = clazz; } }
        java.lang.reflect.Method convertToTranslucent = Activity.class.getDeclaredMethod("convertToTranslucent", translucentConversionListenerClazz, ActivityOptions.class); convertToTranslucent.setAccessible(true); convertToTranslucent.invoke(this, null, options); } catch (Throwable t) {
    }
    break;
    case MotionEvent.ACTION_MOVE:
    if (!lockSwipe){
        if(enableSwipe){
            float translation = event.getRawX() -downX - MIN_DISTANCE;
            if (translation >= rootWidth || translation<= 0){
                rootView.setTranslationX(0);
            }else{
                rootView.setTranslationX(translation);
            }
        }else{
            float translation = event.getRawX() -downX;
            if(Math.abs(event.getRawY() - downY) >= MIN_DISTANCE){
                enableSwipe = false;
                lockSwipe = true;
            }else{
                enableSwipe = event.getRawX() -downX >= MIN_DISTANCE;
            }
        }
    }
    break;
    case MotionEvent.ACTION_UP:
    if(rootView.getTranslationX() > rootWidth / 5){
        rootView.animate()
        .translationX(rootWidth)
        .setListener(
        new AnimatorListenerAdapter() {
                    @Override public void onAnimationEnd(Animator animation) {

                    super.onAnimationEnd(animation);
                finish();
                overridePendingTransition(0, 0);

            } });
    }else{
        rootView.animate()
        .translationX(0)
        .setListener(
        new AnimatorListenerAdapter() {
                    @Override public void onAnimationEnd(Animator animation) {
                super.onAnimationEnd(animation);
                // convert activity back to normal
                try {
                                java.lang.reflect.Method method = Activity.class.getDeclaredMethod("convertFromTranslucent");
                                method.setAccessible(true);
                                method.invoke(this);
                            } catch (Throwable t) {
                            }
            } });
        enableSwipe =false;
        lockSwipe = false;
    }
    break;
    default:
    enableSwipe =false;
    lockSwipe = false;
    break;
}
if (enableSwipe){
    // Event will not be passed to next views
    return true;
}
else{
    // Event will be passed to next views
    return super.dispatchTouchEvent(event);
}
}
{
- 11
- 1
Navigation library
Here is really simple library, fully integrated with NavComponent.
I'm still working on it, but it is already stable so you can use it in production.
https://github.com/massivemadness/Fragula
(Note: it works only with fragments)

First, you need to replace NavHostFragment with FragulaNavHostFragment in your layout:
<!-- activity_main.xml -->
<androidx.fragment.app.FragmentContainerView
    xmlns:android="http://schemas.android.com/apk/res/android"
    xmlns:app="http://schemas.android.com/apk/res-auto"
    android:layout_width="match_parent"
    android:layout_height="match_parent"
    android:name="com.fragula2.FragulaNavHostFragment"
    android:id="@+id/nav_host"
    app:navGraph="@navigation/nav_graph"
    app:defaultNavHost="true" />
Second, you need to replace your <fragment> destinations in graph with <swipeable> as shown below:
<!-- nav_graph.xml -->
<navigation xmlns:android="http://schemas.android.com/apk/res/android"
    xmlns:app="http://schemas.android.com/apk/res-auto"
    xmlns:tools="http://schemas.android.com/tools"
    android:id="@+id/nav_graph"
    app:startDestination="@id/detailFragment">

    <swipeable
        android:id="@+id/detailFragment"
        android:name="com.example.fragula.DetailFragment"
        android:label="DetailFragment"
        tools:layout="@layout/fragment_detail" />

    ...

</navigation>
Finally, you need to set opaque background to your fragment’s root layout to avoid any issues with swipe animation.
<!-- fragment_detail.xml -->
<androidx.constraintlayout.widget.ConstraintLayout
    xmlns:android="http://schemas.android.com/apk/res/android"
    android:layout_width="match_parent"
    android:layout_height="match_parent"
    android:background="?android:colorBackground">

    ...

</androidx.constraintlayout.widget.ConstraintLayout>
That's basically it
- 100
- 2
- 8