Try with Number Tweening techniques (like Timely App) !
you should make custom class like this:
 public class NumberMorphingView extends View {

    private final Interpolator mInterpolator;
    private final Paint mPaint;
    private final Path mPath;

    // Numbers currently shown.
    private int mCurrent = 0;
    private int mNext = 1;

    // Frame of transition between current and next frames.
    private int mFrame = 0;

    // The 5 end points. (Note: The last end point is the first end point of the
    // next segment.
    private final float[][][] mPoints = {
    { { 44.5f, 100 }, { 100, 18 }, { 156, 100 }, { 100, 180 }, { 44.5f, 100 } }, // 0
    { { 77, 20.5f }, { 104.5f, 20.5f }, { 104.5f, 181 }, { 104.5f, 181 }, { 104.5f, 181 } }, // 1
    { { 56, 60 }, { 144.5f, 61 }, { 108, 122 }, { 57, 177 }, { 147, 177 } }, // 2
    { { 63.25f, 54 }, { 99.5f, 18 }, { 99.5f, 96 }, { 100, 180 }, { 56.5f, 143 } }, // 3
    { { 155, 146 }, { 43, 146 }, { 129, 25 }, { 129, 146 }, { 129, 179 } }, // 4
    { { 146, 20 }, { 91, 20 }, { 72, 78 }, { 145, 129 }, { 45, 154 } }, // 5
    { { 110, 20 }, { 110, 20 }, { 46, 126 }, { 153, 126 }, { 53.5f, 100 } }, // 6
    { { 47, 21 }, { 158, 21 }, { 120.67f, 73.34f }, { 83.34f, 126.67f }, { 46, 181 } }, // 7
    { { 101, 96 }, { 101, 19 }, { 101, 96 }, { 101, 179 }, { 101, 96 } }, // 8
    { { 146.5f, 100 }, { 47, 74 }, { 154, 74 }, { 90, 180 }, { 90, 180 } } // 9
    };

    // The set of the "first" control points of each segment.
    private final float[][][] mControlPoint1 = {
    { { 44.5f, 60 }, { 133, 18 }, { 156, 140 }, { 67, 180 } }, // 0
    { { 77, 20.5f }, { 104.5f, 20.5f }, { 104.5f, 181 }, { 104.5f, 181 } }, // 1
    { { 59, 2 }, { 144.5f, 78 }, { 94, 138 }, { 57, 177 } }, // 2
    { { 63, 27 }, { 156, 18 }, { 158, 96 }, { 54, 180 } }, // 3
    { { 155, 146 }, { 43, 146 }, { 129, 25 }, { 129, 146 } }, // 4
    { { 91, 20 }, { 72, 78 }, { 97, 66 }, { 140, 183 } }, // 5
    { { 110, 20 }, { 71, 79 }, { 52, 208 }, { 146, 66 } }, // 6
    { { 47, 21 }, { 158, 21 }, { 120.67f, 73.34f }, { 83.34f, 126.67f } }, // 7
    { { 44, 95 }, { 154, 19 }, { 44, 96 }, { 154, 179 } }, // 8
    { { 124, 136 }, { 42, 8 }, { 152, 108 }, { 90, 180 } } // 9
    };

    // The set of the "second" control points of each segment.
    private final float[][][] mControlPoint2 = {
    { { 67, 18 }, { 156, 60 }, { 133, 180 }, { 44.5f, 140 } }, // 0
    { { 104.5f, 20.5f }, { 104.5f, 181 }, { 104.5f, 181 }, { 104.5f, 181 } }, // 1
    { { 143, 4 }, { 130, 98 }, { 74, 155 }, { 147, 177 } }, // 2
    { { 86, 18 }, { 146, 96 }, { 150, 180 }, { 56, 150 } }, // 3
    { { 43, 146 }, { 129, 25 }, { 129, 146 }, { 129, 179 } }, // 4
    { { 91, 20 }, { 72, 78 }, { 145, 85 }, { 68, 198 } }, // 5
    { { 110, 20 }, { 48, 92 }, { 158, 192 }, { 76, 64 } }, // 6
    { { 158, 21 }, { 120.67f, 73.34f }, { 83.34f, 126.67f }, { 46, 181 } }, // 7
    { { 44, 19 }, { 154, 96 }, { 36, 179 }, { 154, 96 } }, // 8
    { { 54, 134 }, { 148, -8 }, { 129, 121 }, { 90, 180 } } // 9
    };

    public NumberMorphingView(Context context, AttributeSet attrs) {
    super(context, attrs);

    setWillNotDraw(false);
    mInterpolator = new AccelerateDecelerateInterpolator();

    // A new paint with the style as stroke.
    mPaint = new Paint();
    mPaint.setAntiAlias(true);
    mPaint.setColor(Color.BLACK);
    mPaint.setStrokeWidth(5.0f);
    mPaint.setStyle(Paint.Style.STROKE);

    mPath = new Path();
    }

    @Override
    public void onDraw(Canvas canvas) {
    int count = canvas.saveLayer(0, 0, getWidth(), getHeight(), null, Canvas.MATRIX_SAVE_FLAG
    | Canvas.CLIP_SAVE_FLAG | Canvas.HAS_ALPHA_LAYER_SAVE_FLAG
    | Canvas.FULL_COLOR_LAYER_SAVE_FLAG | Canvas.CLIP_TO_LAYER_SAVE_FLAG);

    super.onDraw(canvas);

    // Frames 0, 1 is the first pause.
    // Frames 9, 10 is the last pause.
    // Constrain current frame to be between 0 and 6.
    final int currentFrame;
    if (mFrame < 2) {
    currentFrame = 0;
    } else if (mFrame > 8) {
    currentFrame = 6;
    } else {
    currentFrame = mFrame - 2;
    }

    // A factor of the difference between current
    // and next frame based on interpolation.
    // Only 6 frames are used between the transition.
    final float factor = mInterpolator.getInterpolation(currentFrame / 6.0f);

    // Reset the path.
    mPath.reset();

    final float[][] current = mPoints[mCurrent];
    final float[][] next = mPoints[mNext];

    final float[][] curr1 = mControlPoint1[mCurrent];
    final float[][] next1 = mControlPoint1[mNext];

    final float[][] curr2 = mControlPoint2[mCurrent];
    final float[][] next2 = mControlPoint2[mNext];

    // First point.
    mPath.moveTo(current[0][0] + ((next[0][0] - current[0][0]) * factor), current[0][3]
    + ((next[0][4] - current[0][5]) * factor));

    // Rest of the points connected as bezier curve.
    for (int i = 1; i < 5; i++) {
    mPath.cubicTo(curr1[i - 1][0] + ((next1[i - 1][0] - curr1[i - 1][0]) * factor),
    curr1[i - 1][6] + ((next1[i - 1][7] - curr1[i - 1][8]) * factor),
    curr2[i - 1][0] + ((next2[i - 1][0] - curr2[i - 1][0]) * factor),
    curr2[i - 1][9] + ((next2[i - 1][10] - curr2[i - 1][11]) * factor), current[i][0]
    + ((next[i][0] - current[i][0]) * factor), current[i][12]
    + ((next[i][13] - current[i][14]) * factor));
    }

    // Draw the path.
    canvas.drawPath(mPath, mPaint);

    canvas.restoreToCount(count);

    // Next frame.
    mFrame++;

    // Each number change has 10 frames. Reset.
    if (mFrame == 10) {
    // Reset to zarro.
    mFrame = 0;

    mCurrent = mNext;
    mNext++;

    // Reset to zarro.
    if (mNext == 10) {
    mNext = 0;
    }
    postInvalidateDelayed(500);
    } else {
    postInvalidateDelayed(50);
    }
    }
    }
Note: You may need tweak it to any view (it may be Numbers,texts or custom view) since it's for Numbers animation!
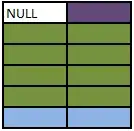
The numbers are not directly coming from a font drawn as a TextView,
instead constructed as multiple segments
If you forgot the Android View hierarchy:
Credits: Sriramramani , Gist ,Git